
in-lite NAIL
-
in-lite | NAIL | Bornes
Prix habituel €187,44Prix habituel -
in-lite | NAIL LOW | Bornes
Prix habituel €167,60Prix habituel


AI traduit
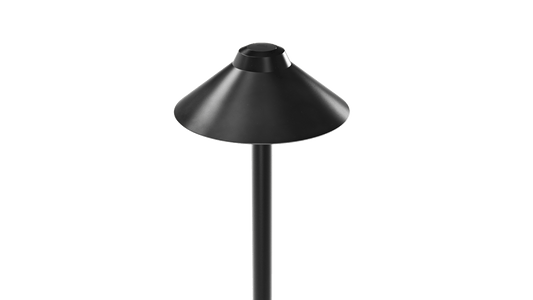
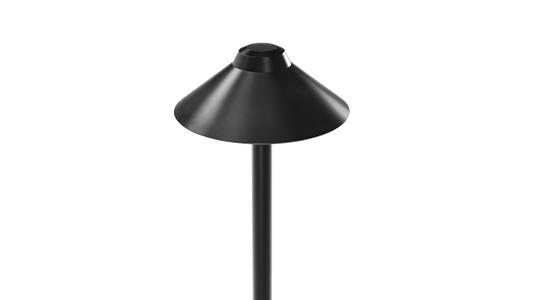
Le NAIL fonctionne parfaitement comme éclairage d’orientation le long d’un chemin ou d’une allée. Son faisceau dirigé vers le bas marque clairement la route sans éblouir, assurant la sécurité et l’accueil de votre espace extérieur. Vous pouvez également positionner les lampes le long d’une bordure pour mettre en valeur les plantes et les fleurs, ou autour d’une terrasse pour créer une ambiance relaxante. Le résultat est une lumière chaude et uniforme qui paraît naturelle et confortable.
Modèles disponibles de l’in-lite NAIL
La gamme in-lite NAIL comprend deux versions :
NAIL (610 mm)
C’est le modèle standard et un choix fiable pour la plupart des jardins et des allées. Sa longue pointe de fixation assure une bonne tenue dans les pelouses, les chemins de gravier et les bordures de plantation plus profondes. Utilisez plusieurs luminaires ensemble pour délimiter clairement un chemin, créer des lignes de lumière subtiles ou ajouter un éclairage discret le long d’une allée.
NAIL LOW (455 mm)
La version plus courte est conçue pour des surfaces moins profondes comme les jardinières, les plates-bandes surélevées ou les pots. Son emplacement idéal est un endroit où la couche de terre est limitée, comme un balcon ou une terrasse sur le toit. Le NAIL LOW offre le même aspect chaleureux et une lumière confortable dans des espaces extérieurs plus compacts.
Installation de l’in-lite NAIL
Comme toutes les lampes d’extérieur in-lite, les lampes NAIL s’installent rapidement et facilement grâce au système basse tension 12V in-lite. L’installation se fait en trois étapes simples :
- Placez la lampe
Enfoncez le NAIL dans le sol à l’endroit choisi. - Déroulez le câble
Déroulez le câble principal 12V le long de la ligne où vous souhaitez positionner vos lampes. - Connectez
Reliez le câble du NAIL au câble principal à l’aide du connecteur Easy-Lock fourni. Ce connecteur étanche s’enclenche solidement sans nécessiter d’outils supplémentaires.
Le résultat est une installation d’éclairage propre, sûre et flexible, facilement extensible à l’avenir.
Conseils sur l’in-lite NAIL par l’expert in-lite
Chez Gardenlightsstore.com, nous sommes spécialisés dans l’éclairage extérieur in-lite et nous sommes heureux de vous aider à faire le bon choix. Vous ne savez pas quel modèle convient le mieux à votre jardin, ou vous souhaitez des conseils pour positionner efficacement votre éclairage ? Contactez-nous, nos spécialistes se feront un plaisir de vous aider.
Dans notre boutique en ligne, vous trouverez la collection complète in-lite. Profitez dès maintenant de la livraison gratuite pour les commandes supérieures à 100 €. Tous les luminaires in-lite bénéficient également d’une garantie in-lite de cinq ans.
Frequently asked questions
How do I make a lighting plan for my garden?
A garden lighting plan is a simple sketch that shows where every outdoor light will be installed before you buy any fixtures. A good lighting plan improves safety, highlights key features such as trees and pathways, and helps you choose the correct transformer and number of fixtures. Most gardens can be planned in five simple steps and within an hour.
Read more: Comment créer un plan d’éclairage pour votre jardin →
Can I install in-lite garden lighting myself?
Yes. The in-lite 12V system is designed for easy installation without any specialist knowledge. Using Easy-Lock connectors, most homeowners can install or expand their lighting system themselves. Always follow the installation instructions and ensure the transformer is installed in a dry, well-ventilated location.
Can one faulty fixture affect the rest of my garden lighting?
In most cases, a single faulty fixture will not stop the rest of the system from working. However, a damaged cable or an incorrectly installed connector can affect multiple fixtures connected to the same cable. Checking the system step by step will help you locate the issue easily.
Does an in-lite ground cable need to be buried?
An in-lite ground cable can be safely concealed beneath a layer of soil. Because the in-lite system operates on 12V low voltage, the cable does not need to be installed like a conventional 230V electrical cable. Always follow the official in-lite instructions when routing and concealing the cable in your garden.
Which in-lite bollard is best for a pathway?
The best in-lite bollard for a garden path depends on the lighting effect, fixture height and design you prefer. The ACE, EVO and NAIL provide more directed orientation lighting, while the DISC and LIV spread light around the fixture and onto the surrounding ground. Consider how much of the path you want to illuminate and how visible you want the fixture to be during the day.
How do I choose the right height for an in-lite bollard?
Choose the height of your bollard according to its surroundings and the role you want it to play in the garden. Lower models work well beside low planting and where you want the fixture to remain discreet, while taller bollards can remain more visible among higher planting. Several in-lite series are available in different heights, allowing you to use a consistent design across different parts of the garden.
How far apart should bollards be placed?
There is no single spacing that works for every garden. The right distance between bollards depends on the fixture's light distribution and height, the layout of the path or border and the lighting effect you want to create. Rather than spacing every fixture equally, position bollards where they help define the route and test the lighting effect after dark before finalising the installation. Try experimenting with a smaller amount of fixtures first before adding more.
How do I make my garden feel warm and inviting with lighting?
Use warm white light (2700K to 3000K) and combine lighting at different heights to create a welcoming atmosphere. Add soft light around seating areas, use directional lighting to highlight selected plants or trees, and leave some areas darker. This balance of light and shadow creates depth and prevents the garden from looking uniformly lit.
Should garden lighting be symmetrical?
Not necessarily. Asymmetrical lighting often creates a more natural and layered effect, particularly around planting, trees, and informal garden paths. Symmetrical lighting can work well around formal entrances, façades, or straight paths where a balanced appearance suits the architecture and garden design.