
in-lite NAIL
-
in-lite | NAIL | Pollare
Ordinarie pris 2 120,00 krOrdinarie pris -
in-lite | NAIL LOW | Pollare
Ordinarie pris 1 896,00 krOrdinarie pris


AI-översatt text
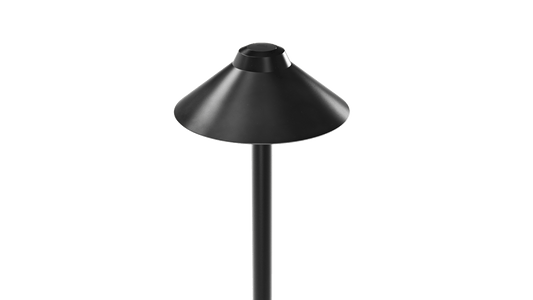
NAIL fungerar perfekt som orienteringsbelysning längs en gångväg eller infart. Dess nedåtriktade ljusstråle markerar tydligt vägen utan att blända, vilket gör din utomhusmiljö säker och välkomnande. Du kan också placera lamporna längs en rabatt för att framhäva växter och blommor, eller runt en terrass för att skapa en avslappnande atmosfär. Resultatet är ett varmt, jämnt ljus som känns naturligt och behagligt.
Tillgängliga modeller från in-lite NAIL
in-lite NAIL-serien inkluderar två versioner:
NAIL (610 mm)
Detta är standardmodellen och ett pålitligt val för de flesta trädgårdar och gångvägar. Dess längre markspjut säkerställer ett stadigt fäste i gräsmattor, grusgångar och djupare planteringsbäddar. Använd flera armaturer tillsammans för att tydligt definiera en gångväg, skapa subtila ljuslinjer eller lägga till diskret belysning längs en infart.
NAIL LOW (455 mm)
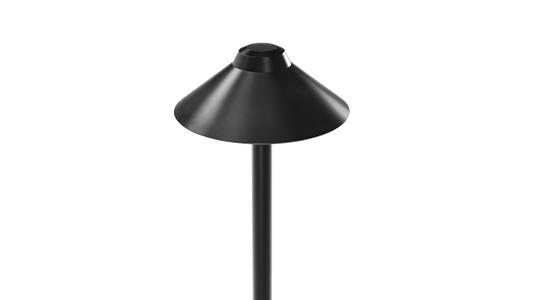
Den kortare versionen är designad för grundare ytor som planteringslådor, upphöjda bäddar eller krukor. Dess idealiska plats är där jordlagret är begränsat, som på en balkong eller takterrass. NAIL LOW ger samma varma utseende och behagliga ljus i mer kompakta utomhusmiljöer.
Installera in-lite NAIL
Precis som alla in-lite utomhuslampor är NAIL-lamporna snabba och enkla att installera med in-lite 12V lågvoltssystem. Installationen sker i tre enkla steg:
- Placera lampan
Tryck ner NAIL i marken på önskad plats. - Lägg ut kabeln
Rulla ut 12V huvudkabeln längs den linje där du vill placera dina lampor. - Anslut
Fäst NAIL-kabeln till huvudkabeln med den medföljande Easy-Lock-kopplingen. Denna vattentäta koppling klickar säkert på plats och kräver inga extra verktyg.
Resultatet blir en ren, säker och flexibel belysningslösning som enkelt kan utökas i framtiden.
Råd om in-lite NAIL från in-lite-experten
På Gardenlightsstore.com är vi specialiserade på in-lite utomhusbelysning och hjälper dig gärna att göra rätt val. Är du osäker på vilken modell som passar din trädgård bäst, eller vill du ha råd om hur du placerar din belysning effektivt? Kontakta oss, våra specialister hjälper dig gärna.
I vår webbutik hittar du hela in-lite-kollektionen. Dra nytta av fri frakt på beställningar över 100 €. Alla in-lite-armaturer levereras dessutom med fem års in-lite-garanti.
Frequently asked questions
Hur gör jag en ljusplan för min trädgård?
En trädgårdsbelysningsplan är en enkel skiss som visar var varje utomhuslampa ska installeras innan du köper några armaturer. En bra belysningsplan förbättrar säkerheten, framhäver viktiga detaljer som träd och gångvägar, och hjälper dig att välja rätt transformator och antal armaturer. De flesta trädgårdar kan planeras i fem enkla steg och inom en timme.
Läs mer: Hur man skapar en belysningsplan för din trädgård →
Kan jag installera in-lite trädgårdsbelysning själv?
Ja. in-lite 12V-systemet är utformat för enkel installation utan specialistkunskaper. Med Easy-Lock-kontakter kan de flesta husägare installera eller bygga ut sitt belysningssystem själva. Följ alltid installationsanvisningarna och se till att transformatorn installeras på en torr plats med god ventilation.
Kan en defekt armatur påverka resten av min trädgårdsbelysning?
I de flesta fall kommer en enskild defekt armatur inte att hindra resten av systemet från att fungera. En skadad kabel eller en felaktigt installerad kontakt kan dock påverka flera armaturer som är anslutna till samma kabel. Genom att kontrollera systemet steg för steg blir det lättare att hitta problemet.
Behöver en in-lite-markkabel grävas ner?
En in-lite-markkabel kan säkert döljas under ett lager jord. Eftersom in-lite-systemet drivs med 12 V lågspänning behöver kabeln inte installeras som en vanlig 230 V-elkabel. Följ alltid de officiella anvisningarna från in-lite när du drar och döljer kabeln i din trädgård.
Vilken in-lite-pollare passar bäst för en gångväg?
Den bästa in-lite-markarmaturen för en trädgårdsgång beror på vilken ljuseffekt, armaturhöjd och design du föredrar. ACE, EVO och NAIL ger ett mer riktat orienteringsljus, medan DISC och LIV sprider ljuset runt armaturen och över den omgivande marken. Fundera på hur stor del av gången du vill belysa och hur synlig du vill att armaturen ska vara under dagen.
Hur väljer jag rätt höjd på en in-lite-pollare?
Välj höjden på din pollare utifrån omgivningen och vilken funktion du vill att den ska ha i trädgården. Lägre modeller passar bra intill låg växtlighet och när du vill att armaturen ska vara diskret, medan högre pollare kan förbli mer synliga bland högre växtlighet. Flera in-lite-serier finns i olika höjder, så att du kan använda en enhetlig design i olika delar av trädgården.
Hur långt ifrån varandra bör pollare placeras?
Det finns inget enda avstånd som fungerar för alla trädgårdar. Det rätta avståndet mellan pollare beror på armaturens ljusfördelning och höjd, gångens eller rabattens utformning samt den belysningseffekt du vill skapa. I stället för att placera alla armaturer med samma avstånd bör du placera pollarna där de hjälper till att definiera sträckningen och testa belysningseffekten efter mörkrets inbrott innan du slutför installationen. Prova först med ett mindre antal armaturer innan du lägger till fler.
Hur får jag min trädgård att kännas varm och välkomnande med belysning?
Använd varmt vitt ljus (2700K till 3000K) och kombinera belysning på olika höjder för att skapa en välkomnande atmosfär. Lägg till mjukt ljus runt sittplatser, använd riktad belysning för att framhäva utvalda växter eller träd och låt vissa områden vara mörkare. Denna balans mellan ljus och skugga skapar djup och hindrar trädgården från att se jämnt belyst ut.
Bör trädgårdsbelysning vara symmetrisk?
Inte nödvändigtvis. Asymmetrisk belysning skapar ofta en mer naturlig effekt med flera lager, särskilt runt planteringar, träd och informella trädgårdsgångar. Symmetrisk belysning kan fungera bra vid formella entréer, fasader eller raka gångar där ett balanserat utseende passar arkitekturen och trädgårdsdesignen.