
in-lite NAIL
-
in-lite | NAIL | Poller
Normaler Preis €185,88Normaler Preis -
in-lite | NAIL LOW | Poller
Normaler Preis €166,21Normaler Preis

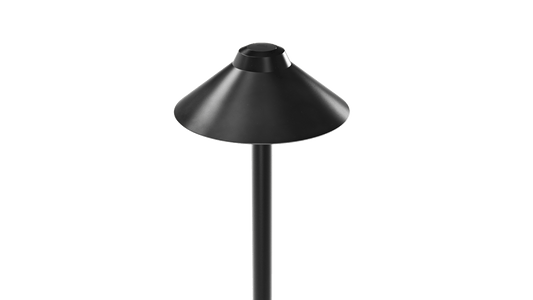

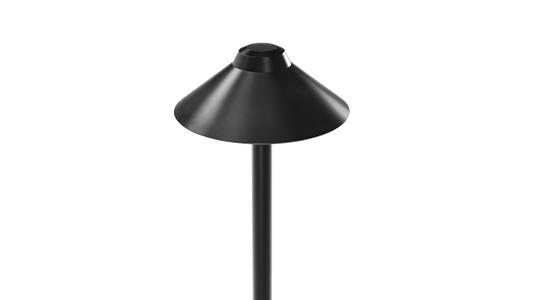
in-lite NAIL oder NAIL LOW: Welche Höhe sollten Sie wählen?
Beide Pollerleuchten bieten denselben weichen, diffusen Beleuchtungsstil. Die Wahl hängt daher hauptsächlich von der umgebenden Bepflanzung und der verfügbaren Bodentiefe ab.
-
in-lite NAIL LOW - 455 mm
Ideal für flache Beete, Hochbeete und Standorte mit begrenzter Bodentiefe, etwa Balkone und Dachterrassen. Der kürzere Erdspieß ermöglicht die Installation, wenn weniger Tiefe zur Verfügung steht. -
in-lite NAIL - 610 mm
Besser geeignet für Wege, Zufahrten, Rasenflächen und tiefere Beete. Die höhere Lichtposition funktioniert gut bei dichterer Bepflanzung, während der längere Erdspieß für einen festeren Halt in Erde und Kies sorgt.
Warum sollten Sie sich für die in-lite NAIL-Serie entscheiden?
-
Weiche, angenehme Beleuchtung
Die breite, runde Abdeckung hält die Lichtquelle aus dem direkten Blickfeld und verteilt das Licht sanft rund um und unter der Leuchte. -
Für Wege und Bepflanzung entwickelt
Die NAIL sorgt für dezente Orientierungsbeleuchtung und beleuchtet gleichzeitig angrenzende Beete, Pflanzen und Gartenränder sanft. -
Hohe Farbwiedergabe
Mit einem CRI von 96 gibt das Licht die Farben von Pflanzen, Blumen und umgebenden Materialien natürlich wieder. -
Erdspieß im Lieferumfang enthalten
Beide Modelle werden mit einem Erdspieß für die Platzierung in weichem Boden geliefert.
Kaufen Sie die in-lite NAIL bei Gardenlightsstore.com
Entdecken Sie die in-lite NAIL-Kollektion bei Gardenlightsstore.com. Mit mehr als 20 Jahren Erfahrung mit in-lite können unsere Beleuchtungsspezialisten Sie bei der Wahl zwischen NAIL und NAIL LOW unterstützen und Sie bei der Positionierung der Pollerleuchten in Ihrem 12V-Gartenbeleuchtungsplan beraten.
Bestellungen über 100 € erhalten kostenlosen Versand in der gesamten EU, und alle Produkte werden mit einer 5-jährigen Garantie geliefert.
Frequently asked questions
How do I make a lighting plan for my garden?
A garden lighting plan is a simple sketch that shows where every outdoor light will be installed before you buy any fixtures. A good lighting plan improves safety, highlights key features such as trees and pathways, and helps you choose the correct transformer and number of fixtures. Most gardens can be planned in five simple steps and within an hour.
Read more: Wie man einen Beleuchtungsplan für seinen Garten erstellt →
Can I install in-lite garden lighting myself?
Yes. The in-lite 12V system is designed for easy installation without any specialist knowledge. Using Easy-Lock connectors, most homeowners can install or expand their lighting system themselves. Always follow the installation instructions and ensure the transformer is installed in a dry, well-ventilated location.
Can one faulty fixture affect the rest of my garden lighting?
In most cases, a single faulty fixture will not stop the rest of the system from working. However, a damaged cable or an incorrectly installed connector can affect multiple fixtures connected to the same cable. Checking the system step by step will help you locate the issue easily.
Does an in-lite ground cable need to be buried?
An in-lite ground cable can be safely concealed beneath a layer of soil. Because the in-lite system operates on 12V low voltage, the cable does not need to be installed like a conventional 230V electrical cable. Always follow the official in-lite instructions when routing and concealing the cable in your garden.
Which in-lite bollard is best for a pathway?
The best in-lite bollard for a garden path depends on the lighting effect, fixture height and design you prefer. The ACE, EVO and NAIL provide more directed orientation lighting, while the DISC and LIV spread light around the fixture and onto the surrounding ground. Consider how much of the path you want to illuminate and how visible you want the fixture to be during the day.
How do I choose the right height for an in-lite bollard?
Choose the height of your bollard according to its surroundings and the role you want it to play in the garden. Lower models work well beside low planting and where you want the fixture to remain discreet, while taller bollards can remain more visible among higher planting. Several in-lite series are available in different heights, allowing you to use a consistent design across different parts of the garden.
How far apart should bollards be placed?
There is no single spacing that works for every garden. The right distance between bollards depends on the fixture's light distribution and height, the layout of the path or border and the lighting effect you want to create. Rather than spacing every fixture equally, position bollards where they help define the route and test the lighting effect after dark before finalising the installation. Try experimenting with a smaller amount of fixtures first before adding more.
How do I make my garden feel warm and inviting with lighting?
Use warm white light (2700K to 3000K) and combine lighting at different heights to create a welcoming atmosphere. Add soft light around seating areas, use directional lighting to highlight selected plants or trees, and leave some areas darker. This balance of light and shadow creates depth and prevents the garden from looking uniformly lit.
Should garden lighting be symmetrical?
Not necessarily. Asymmetrical lighting often creates a more natural and layered effect, particularly around planting, trees, and informal garden paths. Symmetrical lighting can work well around formal entrances, façades, or straight paths where a balanced appearance suits the architecture and garden design.